The parameter input form differs from system to system. This chapter will explain the main parameter input forms and their special characteristics.
The different operating modes
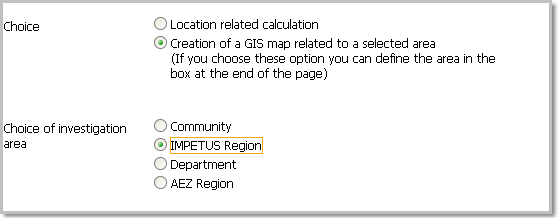
•Radio button
This input format allows the user to choose only one single parameter. To choose the parameter, click in the circle by the desired selection.

•Date
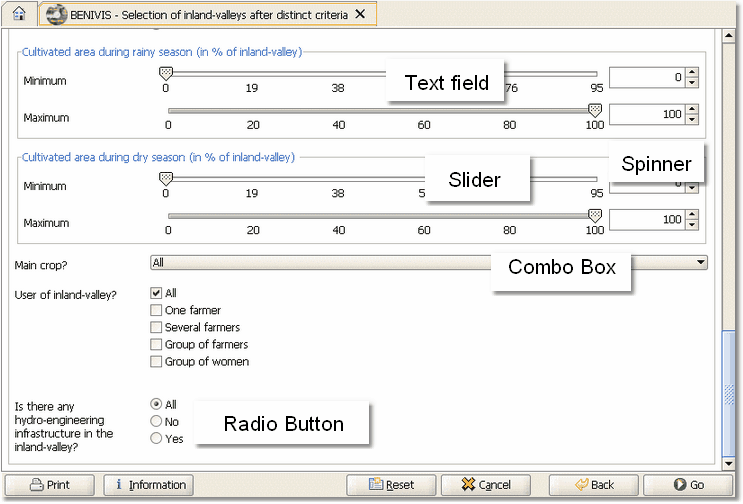
In this field the user can enter the start date by using the spinner. To set the date, click on the arrow buttons next to the input field.

The Slider simplifies working with parameters because the numerical area of the parameter to choose is predefined. It works in the same way as the spinner. Click with left cursor key on the pointer and pull it to the desired position. In order to achieve a precise number use the Spinner on the right hand of the Slider.

Using the arrow buttons the user can enter the exact value of the parameter. For every number step click the button once.
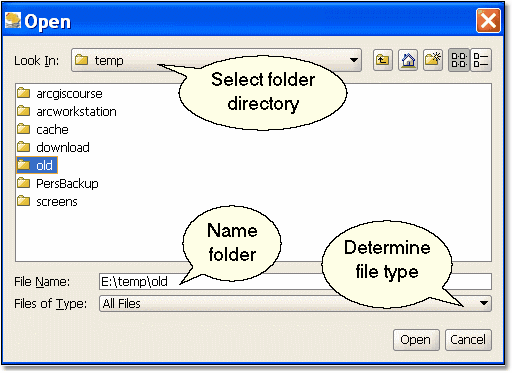
At this point, the user can import their own files. Click on the "open" button and type in the path name. Another dialogue window will open. A file dialogue window can be implemented in addition to other parameter inputs in the form.


The dialogue window to chose the path
•Text field
This field gives explanations in order to simplify the parameter input for the user (see graph below).
•Input fields
In this field the user enters the relevant information. Fields marked with a purple background (see screenshot below) must be completed otherwise an error message appears. It is also obligatory to fill in the fields surrounded by a black frame. Completion of the other fields is optional.

In this field the user can chose further parameters from a list by clicking on the relevant arrow buttons on the right hand side of the parameters.

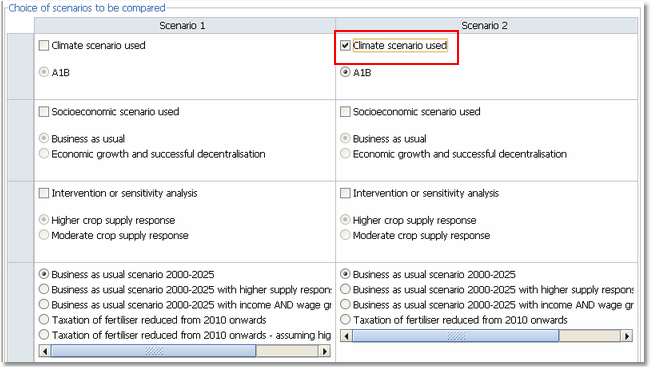
•Tabular Selection
In this field the user can select the desired scenario by simply clicking ![]() in the box next to the indicated scenario.
in the box next to the indicated scenario.

•Start modelling
Once all the parameters have been set and all the necessary fields have been completed, the modelling can begin. To start, click on the "Go" button. This will take the user to the process overview.

